Pages

Selasa, 21 Oktober 2025

92+ Aquaponics Zimbabwe

Aquaponics system with fish, plants, and vegetables growing in a greenhouse setting stock image www.dreamstime.com

Introduction: Aquaponics at Home Aquaponics is a fantastic sustainable gardening method that combines aquaculture (raising fish) and hydroponics (growing plants without soil). This allows for a closed-loop system where fish waste fertilizes plants, and plants filter the water for the fish. This guide will walk you through building a simple, small-scale aquaponic system perfect for beginners.
Materials and Tools You'll Need Before you start, gather the necessary materials and tools. This will ensure a smooth building process.
  • Fish Tank: A plastic tub or aquarium (approx. 10-20 gallons is ideal to start).
  • Grow Bed: A plastic container that fits on top of or beside the fish tank. It should be slightly smaller or the same size as the fish tank.
  • Water Pump: A submersible pump with a low flow rate (around 50-100 gallons per hour).
  • Tubing: Food-grade tubing to connect the pump to the grow bed and drain back to the fish tank.
  • Bell Siphon Components (Optional but recommended): This includes a bell siphon (DIY or purchased), media guard, and stand pipe. These components automatically drain the grow bed. If you skip the bell siphon, you'll need a timer to control the pump.
  • Grow Media: Clay pebbles (hydroton) or gravel.
  • Fish: Goldfish, guppies, or tilapia are good options (research species appropriate for your climate and tank size).
  • Plants: Leafy greens like lettuce, spinach, and herbs like basil are great choices for beginners.
  • Tools: Drill, drill bits (various sizes), saw or box cutter (for cutting tubing), measuring tape, and safety glasses.
Step 1: Preparing the Fish Tank The fish tank is the heart of your aquaponics system. Make sure it's clean and ready to house your fish.
  • Clean the fish tank thoroughly with water only. Avoid using soap or detergents, as these can be harmful to the fish.
  • Place the tank in a location that receives indirect sunlight. Direct sunlight can cause algae blooms and temperature fluctuations.
  • If using an aquarium, ensure it's level and stable.
  • Step 2: Setting up the Grow Bed The grow bed is where your plants will thrive. Proper drainage is essential.
  • Drill drainage holes in the bottom of the grow bed. The size and number of holes will depend on your grow media. Too few and the water will not drain fast enough, too many and the bed will drain too fast.
  • If using a bell siphon, install it in the grow bed according to the manufacturer's instructions or the DIY guide you're following. The standpipe should be slightly shorter than the depth of the grow bed. Place the media guard around the standpipe to prevent media from clogging the drain.
  • If you are not using a bell siphon, you will need to drill a hole for a drain fitting near the bottom of the grow bed and attach appropriate tubing.
  • Step 3: Connecting the Plumbing This step involves connecting the pump to the grow bed and ensuring proper drainage back to the fish tank.
  • Place the submersible pump in the fish tank.
  • Attach tubing to the pump outlet.
  • Run the tubing from the pump to the grow bed. Secure the tubing in place so it doesn't fall out.
  • If using a bell siphon, position the outlet of the siphon's drain tube over the fish tank so water drains back in.
  • If not using a bell siphon, run the drain tubing from the drain fitting in the growbed to the fish tank.
  • Step 4: Adding Grow Media and Cycling the System Now it's time to add the grow media and start the cycling process.
  • Rinse the grow media thoroughly to remove any dust or debris.
  • Fill the grow bed with the rinsed grow media.
  • Fill the fish tank with dechlorinated water. Use a water conditioner designed for aquariums to remove chlorine and chloramine.
  • Start the pump and let the system run. If you are using a bell siphon, ensure it cycles properly (fills and drains automatically). If not, you'll need to use a timer to control the pump, running it for 15 minutes every hour.
  • Add ammonia to the tank to start the nitrogen cycle. You can use pure ammonia or fish food. Monitor the ammonia, nitrite, and nitrate levels with a water testing kit. The cycle is complete when ammonia and nitrite levels are consistently zero, and nitrates are present. This process can take several weeks.
  • Step 5: Introducing Fish and Plants Once the nitrogen cycle is established, you can introduce your fish and plants.
  • Acclimate the fish to the tank water gradually by floating the bag they came in for about 30 minutes.
  • Release the fish into the tank. Start with a small number of fish to avoid overloading the system.
  • Gently plant your seedlings in the grow media. Make sure the roots are covered but the leaves are exposed.
  • Conclusion: Maintaining Your Aquaponics System Congratulations! You've built your own aquaponics system. Regular maintenance is crucial for success.
  • Monitor water quality regularly (ammonia, nitrite, nitrate, pH).
  • Top up water lost through evaporation.
  • Clean the fish tank and grow bed periodically.
  • Feed the fish a balanced diet.
  • Harvest your plants as they mature.
  • Adjust the system as needed to optimize plant growth and fish health.
  • Aquaponics System With Fish, Plants, And Vegetables Growing In A Greenhouse Setting Stock Image

    Aquaponics system with fish, plants, and vegetables growing in a greenhouse setting stock image www.dreamstime.com

    What Is Aquaponics

    What is aquaponics survivallife.com

    Aquaponics

    Aquaponics www.britannica.com
    Read More..

    Senin, 20 Oktober 2025

    74+ Aquaponics Place

    Commercial aquaponics • nelson & pade aquaponics aquaponics.com

    ```html
    Introduction: Embracing Aquaponics at Home Aquaponics, the synergistic combination of aquaculture (raising fish) and hydroponics (growing plants without soil), offers a sustainable and efficient way to produce fresh food right in your own backyard or even indoors. This guide will walk you through building a simple, yet effective, aquaponics system, perfect for beginners.
    Materials You'll Need: Gathering Your Aquaponic Arsenal Before you begin, gather these essential materials:
  • A fish tank (approximately 20-50 gallons is a good starting size)
  • A grow bed (should be the same volume or larger than the fish tank)
  • A water pump (rated for the size of your tank and grow bed)
  • Grow media (clay pebbles, lava rock, or similar inert material)
  • Plumbing fittings and tubing (to connect the tank, pump, and grow bed)
  • An air pump and air stone (to oxygenate the water for the fish)
  • Fish (e.g., goldfish, tilapia, or koi – research the best type for your climate)
  • Seeds or seedlings (leafy greens, herbs, and strawberries work well)
  • A siphon (bell siphon or auto-siphon are recommended)
  • Step 1: Setting Up the Fish Tank Start by placing your fish tank in a stable and suitable location. Ensure it's on a level surface and away from direct sunlight, which can promote algae growth. Fill the tank with dechlorinated water. Dechlorination is critical to the survival of your fish. Let the water sit for 24 hours or use a dechlorinating solution specifically designed for aquariums. Install the air pump and air stone to provide adequate oxygen for the fish. Turn the pump on.
    Step 2: Constructing the Grow Bed Position the grow bed directly above or adjacent to the fish tank. The height difference will allow gravity to assist with drainage, particularly if using a siphon. Make sure the grow bed is sturdy enough to hold the weight of the wet grow media. Fill the grow bed with your chosen grow media, rinsing it thoroughly beforehand to remove any dust or debris.
    Step 3: Plumbing and Water Circulation This is where the magic happens. Connect the water pump to the fish tank. Run tubing from the pump up to the grow bed. The pump will push water from the fish tank into the grow bed. Now, install the siphon in the grow bed. This device will automatically drain the water back into the fish tank when it reaches a certain level, creating a flood-and-drain cycle. Ensure all connections are secure to prevent leaks.
    Step 4: Cycling the System Before introducing fish and plants, you need to cycle the system to establish a beneficial bacteria colony. This bacteria converts fish waste into nutrients that plants can use. Add a small amount of ammonia (fish food or pure ammonia) to the tank to start the cycle. Monitor the ammonia, nitrite, and nitrate levels with a test kit. The cycle is complete when ammonia and nitrite levels consistently read zero, and nitrate levels are present. This can take several weeks.
    Step 5: Introducing Fish and Plants Once the system is cycled, you can introduce your fish gradually. Start with a small number and observe them closely for any signs of stress. Plant your seeds or seedlings into the grow media. Ensure the roots are in contact with the moist media.
    Step 6: Monitoring and Maintenance Regularly monitor the water parameters (pH, ammonia, nitrite, nitrate) and adjust as needed. A stable pH of around 6-7 is ideal. Add water to the fish tank as needed to compensate for evaporation. Clean the fish tank periodically to remove any accumulated debris. Supplement with liquid fertilizer if plant growth is slow, being careful to choose a fish-safe option.
    Conclusion: Harvesting Your Aquaponic Bounty Congratulations! You've built your own aquaponics system. With proper care and attention, you'll be harvesting fresh, organic produce in no time, all while providing a healthy environment for your fish. Enjoy the fruits (and vegetables) of your labor, and the satisfaction of creating a sustainable food source.
    ```

    Commercial Aquaponics • Nelson & Pade Aquaponics

    Commercial aquaponics • nelson & pade aquaponics aquaponics.com

    Aquaponics Hydroponics System & Lights Near Acton & Ayer Ma

    Aquaponics hydroponics system & lights near acton & ayer ma www.thegrowhub.com

    School Aquaponics Project

    School aquaponics project ourcanadaproject.ca
    Read More..

    Minggu, 19 Oktober 2025

    154+ Best Plants For Aquaponics System

    Pastor's blog www.kingofkingslutheranchurchnnj.org

    Introduction: Diving into DIY Aquaponics Aquaponics, the marriage of aquaculture (raising aquatic animals) and hydroponics (growing plants without soil), offers a sustainable and efficient way to grow food. Building your own system can be incredibly rewarding, allowing you to tailor it to your space and needs. This guide will walk you through the process of creating a simple, yet effective, DIY aquaponics system.
    Step 1: Planning and Design Before you start grabbing materials, take some time to plan your system. Consider the following:
  • System Type: Decide on the type of aquaponic system you want to build. Common types include deep water culture (DWC), media beds, and nutrient film technique (NFT). For beginners, a media bed system is often the easiest to manage.
  • Size and Location: Determine the size of your system based on available space and how much produce you want to grow. Choose a location that receives adequate sunlight (at least 6 hours per day) or is suitable for grow lights.
  • Fish Tank: Select a fish tank of appropriate size. A general rule of thumb is 1 inch of fish per gallon of water. Ensure the tank is food-grade and safe for aquatic life.
  • Grow Bed: Decide on the dimensions of your grow bed. It should be large enough to accommodate your plants and provide adequate filtration.
  • Step 2: Gathering Materials Here's a list of materials you'll need to build a basic media bed aquaponics system:
  • Fish Tank: A container for your fish (e.g., a plastic tote or aquarium).
  • Grow Bed: A container for your plants (e.g., a plastic tub or wooden box lined with plastic).
  • Grow Media: Gravel, clay pebbles, or lava rock to support plant roots.
  • Water Pump: A submersible water pump to circulate water between the fish tank and grow bed.
  • Air Pump and Air Stone: To provide oxygen to the fish.
  • Plumbing: Tubing and fittings to connect the fish tank, pump, and grow bed.
  • Bell Siphon (Optional): For automatic draining and filling of the grow bed. If you choose to omit the bell siphon you will need to manually drain the grow bed.
  • Fish: Suitable aquaponics fish (e.g., tilapia, goldfish, trout). Make sure fish are legal to own in your area.
  • Plants: Seedlings or seeds of your desired plants.
  • pH Testing Kit: To monitor and adjust the water's pH level.
  • Dechlorinator: To remove chlorine from tap water before adding fish.
  • Step 3: Building the System
  • Setting up the Fish Tank: Place the fish tank in its designated location. Fill it with dechlorinated water and add the air stone. Allow the water to cycle for a few days before introducing fish.
  • Constructing the Grow Bed: Position the grow bed above the fish tank (gravity will assist in drainage). If using a wooden box, line it with plastic to prevent leaks. Fill the grow bed with your chosen grow media.
  • Plumbing and Water Circulation: Connect the water pump to the fish tank. Run tubing from the pump to the grow bed, ensuring the water is distributed evenly. If using a bell siphon, install it in the grow bed to automatically drain water back into the fish tank. If you omit the bell siphon, simply allow gravity to bring the water back to the tank.
  • Testing the System: Turn on the water pump and observe the water circulation. Ensure the grow bed fills and drains properly. Check for any leaks and make necessary adjustments. Monitor the water pH and adjust if needed (aim for a pH of around 6.0-7.0).
  • Step 4: Introducing Fish and Plants
  • Adding Fish: Once the water parameters are stable, gradually introduce your fish to the tank. Start with a small number and monitor their behavior. Feed them regularly with appropriate fish food.
  • Planting Seedlings or Seeds: Plant your seedlings or seeds in the grow media. Ensure the roots are properly supported. Provide adequate lighting and nutrients as needed.
  • Step 5: Maintaining Your Aquaponics System
  • Water Quality Monitoring: Regularly test the water pH, ammonia, nitrite, and nitrate levels. Adjust as needed to maintain optimal conditions for both fish and plants.
  • Water Changes: Perform partial water changes (around 20-30%) every few weeks to remove excess nutrients and maintain water quality.
  • Feeding Fish: Feed your fish regularly with a high-quality fish food. Adjust the feeding amount based on the size and number of fish.
  • Plant Care: Monitor your plants for signs of nutrient deficiencies or pests. Provide supplemental nutrients or pest control as needed.
  • System Cleaning: Periodically clean the fish tank and grow bed to remove debris and algae.
  • Conclusion: Enjoying Your Homegrown Harvest Congratulations! You've successfully built your own DIY aquaponics system. With proper care and maintenance, you can enjoy a continuous supply of fresh, homegrown produce and healthy fish. Aquaponics is a rewarding and sustainable way to grow food, and it's a great way to learn about ecosystems and sustainable living. Remember to experiment, learn from your experiences, and enjoy the process!

    Vote For The Best Of The Decade

    Vote for the best of the decade arapahoelibraries.org

    Top 7 Amazon Review Checkers To Spot Fake Reviews

    Top 7 amazon review checkers to spot fake reviews mywifequitherjob.com

    Pastor's Blog

    Pastor's blog www.kingofkingslutheranchurchnnj.org
    Read More..

    Sabtu, 18 Oktober 2025

    97+ Aquaponic Garden Kit

    5.3 mitigating climate change and increased food security through aquaponics systems technology ohiostate.pressbooks.pub

    Introduction: The Allure of Aquaponics Aquaponics, a symbiotic blend of aquaculture (raising fish) and hydroponics (growing plants without soil), offers a sustainable and rewarding gardening experience. This guide provides a step-by-step approach to building a simple yet effective aquaponic garden kit.
    Step 1: Gathering Your Materials The success of your aquaponic system hinges on the right materials. Here's a breakdown of what you'll need:
    • Fish Tank: A container to house your fish. Size depends on the number of fish you plan to raise. A minimum of 20 gallons is recommended for beginners.
    • Grow Bed: A container above the fish tank to hold your plants and grow media. It should be slightly smaller or the same size as the fish tank.
    • Grow Media: Clay pebbles, lava rock, or gravel work well to support plants and filter water.
    • Water Pump: Submersible pump to circulate water from the fish tank to the grow bed. Choose a pump with appropriate flow rate for your system size.
    • Tubing: Flexible tubing to connect the pump to the grow bed and return water to the fish tank.
    • Bell Siphon Components: This automatically drains the grow bed, creating a flood and drain cycle. You'll need a bell siphon, a standpipe, and a gravel guard. (Alternative: timer and pump setup)
    • Air Pump and Air Stone: To provide oxygen for the fish.
    • Fish: Choose hardy, edible fish like tilapia, goldfish or koi (goldfish and koi are not typically eaten). Research their needs and compatibility with your chosen plants.
    • Plants: Leafy greens like lettuce, spinach, and herbs are ideal for beginners.
    • Optional: Tank heater (if needed for your chosen fish species). pH testing kit.
    Step 2: Constructing the Grow Bed The grow bed is where your plants will thrive, so proper construction is key.
    1. Prepare the Container: Ensure your grow bed container is clean and food-grade safe. If using a plastic container, check for BPA-free certification.
    2. Drill Holes for Plumbing: Drill holes for the inlet (water from the pump) and outlet (drain back to the fish tank). Size the holes to match your tubing fittings.
    3. Install the Bell Siphon or Timer Setup:
      • Bell Siphon: Place the standpipe in the center of the outlet hole. Cover it with the bell siphon. Place the gravel guard around the bell siphon.
      • Timer and Pump: Connect the pump to a timer. Set the timer to flood the grow bed for a set period (e.g., 15 minutes) and then turn off, allowing it to drain.
    Step 3: Setting Up the Plumbing Proper water circulation is vital for nutrient delivery and waste removal.
    1. Connect the Pump: Place the water pump in the fish tank. Connect tubing from the pump outlet to the inlet hole on the grow bed.
    2. Return Water: Position the grow bed above the fish tank so the outlet drains directly back into the tank. Secure the tubing to prevent leaks.
    3. Air Pump: Place the air stone in the fish tank and connect it to the air pump. Position the air pump outside the tank to prevent water damage.
    Step 4: Assembling the System Putting all the components together creates your aquaponic ecosystem.
    1. Position the Grow Bed: Carefully place the grow bed on top of the fish tank or on a sturdy stand above the fish tank. Ensure it's level.
    2. Add Grow Media: Rinse the grow media thoroughly to remove dust and debris. Fill the grow bed with the cleaned media to a level that allows for root support.
    3. Fill the Fish Tank: Fill the fish tank with dechlorinated water. Let it sit for a day or two to allow the chlorine to evaporate. Use a dechlorinating solution if necessary.
    Step 5: Cycling the System Before adding fish and plants, you need to establish a beneficial bacteria colony. This process is called cycling.
    1. Start the Pump: Turn on the water pump and air pump. Observe the system for any leaks.
    2. Add Ammonia: Add a source of ammonia to the fish tank to start the nitrogen cycle. Fish food that decomposes will also work.
    3. Monitor Water Parameters: Test the water regularly for ammonia, nitrite, and nitrate levels. The goal is for ammonia and nitrite levels to reach zero, and nitrate levels to rise. This indicates the bacteria colony is established.
    4. Cycling Time: This process can take several weeks. Be patient and continue monitoring water parameters.
    Step 6: Introducing Fish and Plants Once the system is cycled, you can introduce fish and plants.
    1. Acclimate the Fish: Slowly introduce the fish to the tank water by floating the bag they came in for about 30 minutes. This helps them adjust to the temperature.
    2. Add Plants: Gently plant your seedlings in the grow media. Make sure the roots are covered, but the stem is exposed.
    3. Monitor and Adjust: Regularly check the water quality, pH, and fish health. Adjust the system as needed to maintain optimal conditions.
    Conclusion: Enjoying Your Aquaponic Garden Congratulations! You've successfully built your own aquaponic garden. With regular maintenance and careful observation, you'll be rewarded with fresh produce and a fascinating ecosystem. Remember to research specific needs of your chosen fish and plants for long-term success. Happy growing!

    Sahib's Florida Aquaponic Produce — Read The Dirt

    Sahib's florida aquaponic produce — read the dirt readthedirt.org

    Nelson And Pade Clear Flow Aquaponics System

    Nelson and pade clear flow aquaponics system flickr.com

    5.3 Mitigating Climate Change And Increased Food Security Through Aquaponics Systems Technology

    5.3 mitigating climate change and increased food security through aquaponics systems technology ohiostate.pressbooks.pub
    Read More..

    Jumat, 17 Oktober 2025

    184+ Aquaponics Malta

    Aquaponics-what is aquaponics and how does it work? agromoris.com

    ```html
    Introduction: Building a Simple DIY Aquaponics System
    Aquaponics combines aquaculture (raising aquatic animals) and hydroponics (growing plants without soil) in a symbiotic environment. The fish waste provides nutrients for the plants, and the plants filter the water for the fish. This guide will walk you through building a small, beginner-friendly system.
    Materials You'll Need:
    • Fish Tank: A plastic tote or aquarium (approx. 20 gallons or larger).
    • Grow Bed: A plastic container that fits on top of or beside the fish tank.
    • Water Pump: A submersible pump with a low flow rate (around 100-200 gallons per hour).
    • Air Pump and Air Stone: To provide oxygen for the fish.
    • Grow Media: Clay pebbles or gravel.
    • Plumbing: Tubing to connect the pump to the grow bed, and a method for the water to drain back into the fish tank (e.g., a siphon or overflow pipe).
    • Fish: Goldfish or other hardy fish suitable for small tanks (start with a few).
    • Plants: Leafy greens like lettuce, spinach, or herbs are good starting choices.
    • pH Testing Kit: To monitor the water quality.
    Step 1: Setting Up the Fish Tank
    Clean the fish tank thoroughly with water only (no soap!). Place the tank in a location that receives indirect sunlight. Install the air pump and air stone. Fill the tank with dechlorinated water. Let the water sit for a few days to dechlorinate naturally, or use a water conditioner to remove chlorine and chloramine.
    Step 2: Preparing the Grow Bed
    Clean the grow bed thoroughly. Place the grow media (clay pebbles or gravel) in the grow bed. Rinse the grow media to remove any dust or debris.
    Step 3: Connecting the Plumbing
    Place the grow bed in its desired location, either on top of the fish tank (for a gravity-fed system) or beside it. Connect the water pump to the tubing. Run the tubing from the pump to the grow bed. Create a drainage system to allow the water to flow from the grow bed back into the fish tank. This can be a simple siphon (see online tutorials for creating a siphon) or an overflow pipe. Make sure the drainage system is reliable to prevent flooding.
    Step 4: Cycling the System
    This is a crucial step to establish beneficial bacteria that will convert fish waste into plant nutrients. Run the pump and let the water circulate between the fish tank and the grow bed. Add a small amount of ammonia to the tank (fish food or pure ammonia can be used). Test the water daily for ammonia, nitrite, and nitrate levels. The cycling process is complete when ammonia and nitrite levels consistently read zero, and nitrate levels are present. This process can take several weeks.
    Step 5: Introducing the Fish
    Once the system is cycled, slowly introduce the fish to the tank. Float the bag containing the fish in the tank for about 15 minutes to acclimate the fish to the water temperature. Then, gently release the fish into the tank.
    Step 6: Planting the Plants
    Once the fish are settled, you can plant your plants in the grow bed. Gently remove the plants from their pots and rinse off any excess soil. Plant the seedlings directly into the grow media.
    Step 7: Maintaining Your System
    Regularly test the water pH and adjust as needed. Maintain a pH level between 6.0 and 7.0. Add water to the tank as needed to compensate for evaporation. Clean the fish tank and grow bed periodically to remove any debris. Monitor the fish and plants for signs of disease or pests. Feed the fish a high-quality fish food.
    Conclusion: Enjoying Your Aquaponics System
    Building a DIY aquaponics system is a rewarding project that combines gardening and aquaculture. With regular maintenance and attention, you can enjoy fresh produce and healthy fish. Remember to research and adapt this guide to your specific needs and environment. Happy growing!
    ```

    Aquaponic Gardening Systems

    Aquaponic gardening systems fity.club

    What Is Aquaponics

    What is aquaponics survivallife.com

    Aquaponics-what Is Aquaponics And How Does It Work?

    Aquaponics-what is aquaponics and how does it work? agromoris.com
    Read More..

    Kamis, 16 Oktober 2025

    100+ Aquaponic Gardening Meaning

    Aquaponic gardening aquaponic-gardening.blogspot.com

    ```html
    Opening: Diving into DIY Aquaponics
    Aquaponic gardening combines aquaculture (raising aquatic animals) and hydroponics (growing plants without soil) in a symbiotic environment. It's a fantastic way to grow your own food sustainably. This guide will walk you through building a simple, small-scale DIY aquaponics system. Get ready to create your own ecosystem!
    Step 1: Planning Your System
    Before you start building, you need a plan. Consider the following:
    • What size system do you want? (This guide focuses on a small system suitable for beginners.)
    • What fish will you raise? (Goldfish or tilapia are popular choices for small systems.)
    • What plants will you grow? (Leafy greens like lettuce and herbs like basil thrive in aquaponics.)
    • Where will you locate the system? (It needs sunlight or grow lights.)
    Step 2: Gathering Your Materials
    You'll need these basic components:
    • A fish tank (around 20 gallons is a good starting point).
    • A grow bed (a container to hold your plants and growing medium).
    • A water pump (to circulate water between the tank and grow bed).
    • Plumbing (tubing and fittings to connect the tank, pump, and grow bed).
    • Growing medium (clay pebbles, lava rock, or gravel).
    • Fish (after the system is cycled).
    • Seeds or seedlings.
    • A bell siphon (optional, but recommended for flood and drain systems).
    Step 3: Constructing the System
    Follow these steps to assemble your aquaponics system:
    1. Fish Tank Setup: Place the fish tank in its desired location.
    2. Grow Bed Setup: Position the grow bed above the fish tank. This allows gravity to assist with water return.
    3. Plumbing Installation: Connect the water pump to tubing that runs from the fish tank to the grow bed.
    4. Return Pipe: Install a return pipe from the grow bed back to the fish tank. This could be a simple drain or, ideally, a bell siphon (see Step 4).
    Step 4: Installing the Bell Siphon (Optional but Recommended)
    A bell siphon automates the flooding and draining of the grow bed, providing plants with alternating periods of saturation and aeration.
    1. Siphon Placement: Place the bell siphon over the drain hole in the grow bed.
    2. Water Level: Adjust the siphon's components (bell, standpipe, and media guard) to control the water level in the grow bed.
    3. Testing: Test the siphon by filling the grow bed with water and observing its draining action.
    Step 5: Cycling the System
    Cycling is crucial to establish a healthy ecosystem. It involves building up beneficial bacteria that convert fish waste into plant nutrients.
    1. Fill the System: Fill the fish tank and grow bed with water.
    2. Add Ammonia: Add a source of ammonia (fish food or pure ammonia) to start the cycle.
    3. Monitor Water Parameters: Regularly test the water for ammonia, nitrites, and nitrates. The cycle is complete when ammonia and nitrites consistently read zero and nitrates are present. This process typically takes 4-6 weeks.
    Step 6: Adding Fish and Plants
    Once the system is cycled, it's time to introduce fish and plants.
    1. Acclimate Fish: Gradually acclimate the fish to the tank water by floating the bag they came in for about 30 minutes.
    2. Add Fish Slowly: Start with a small number of fish to avoid overwhelming the system.
    3. Plant Seedlings: Gently plant seedlings in the grow bed, ensuring the roots are surrounded by the growing medium.
    Step 7: Maintenance
    Regular maintenance is essential for a thriving aquaponics system:
    • Water Testing: Regularly test water parameters (pH, ammonia, nitrites, nitrates).
    • Water Changes: Perform partial water changes (10-20%) every few weeks.
    • Plant Care: Trim plants as needed and provide supplemental nutrients if necessary.
    • Fish Care: Feed the fish regularly and monitor them for signs of disease.
    Conclusion: Enjoying Your Aquaponic Garden
    Congratulations! You've built your own DIY aquaponics system. With a little care and attention, you'll be enjoying fresh, homegrown produce and healthy fish in no time. Happy gardening!
    ```

    Aquaponic Gardening

    Aquaponic gardening aquaponic-gardening.blogspot.com

    Aquaponic Gardening

    Aquaponic gardening aquaponic-gardening.blogspot.com

    Aquaponic Gardening

    Aquaponic gardening blog.jungseed.com
    Read More..

    Rabu, 15 Oktober 2025

    54+ Hydroponic And Aquaponic Farming

    Hydroponic / aquaponic farming 
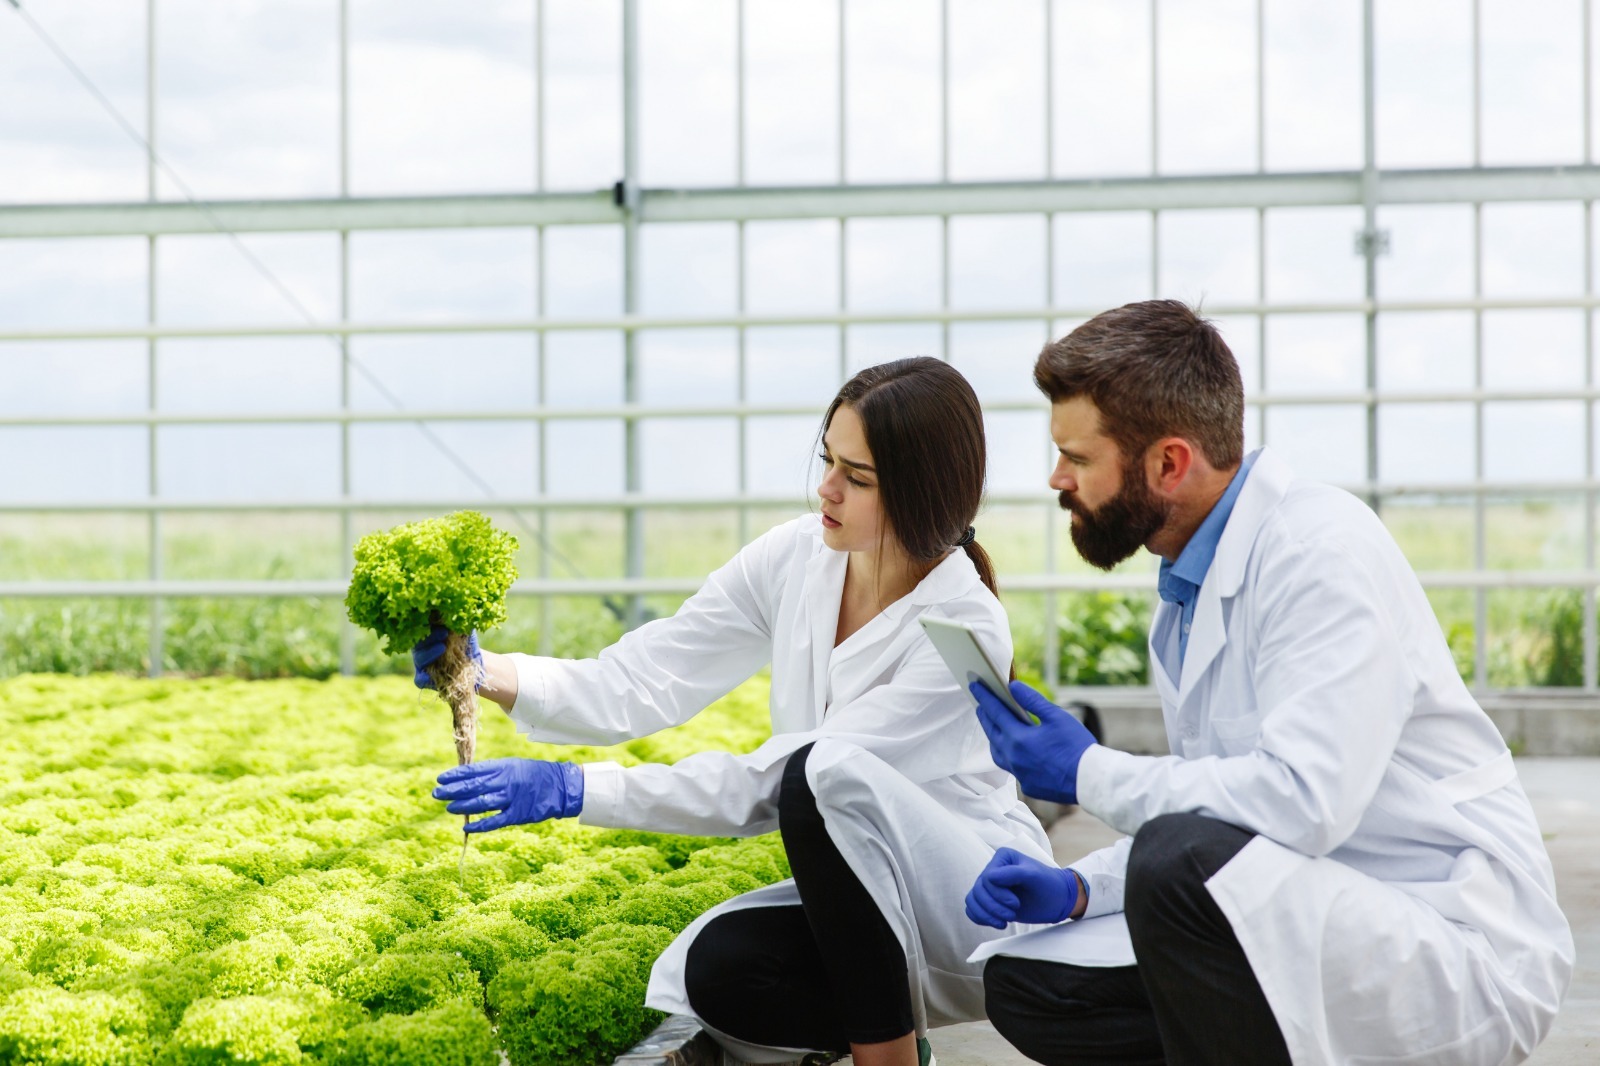
mohitmangal.com

    ```html
    Opening: Exploring the World of Hydroponic and Aquaponic Farming Hydroponic and aquaponic farming are innovative methods for growing plants without soil. Hydroponics focuses solely on nutrient solutions, while aquaponics combines hydroponics with aquaculture, raising fish and using their waste to nourish the plants. This post will guide you through building a simple DIY hydroponic system.
    Step 1: Gathering Your Materials Before you begin, ensure you have all the necessary materials. This will streamline the construction process and prevent unnecessary delays. Here's a list of what you'll need:
  • A plastic storage container (approximately 10-20 gallons)
  • Net pots (enough for the number of plants you want to grow)
  • Hydroponic grow media (such as rockwool, coco coir, or clay pebbles)
  • An air pump and air stone
  • Air tubing
  • Hydroponic nutrient solution
  • pH testing kit
  • Drill with hole saw attachment (matching the diameter of your net pots)
  • Step 2: Preparing the Container The plastic storage container will serve as the reservoir for your nutrient solution. Clean it thoroughly to remove any dirt or residue. Once clean, use the hole saw attachment on your drill to create holes in the lid of the container. These holes should be evenly spaced and sized to securely hold the net pots.
    Step 3: Setting Up the Air Circulation Proper aeration is crucial for healthy root development. Connect the air tubing to the air pump and the air stone. Place the air stone inside the container, at the bottom. The air pump will oxygenate the nutrient solution, preventing root rot and providing essential oxygen to the plants.
    Step 4: Preparing the Net Pots and Grow Media Insert the net pots into the holes you drilled in the container lid. Fill each net pot with your chosen hydroponic grow media. Make sure the grow media is adequately moistened before planting.
    Step 5: Adding Nutrient Solution and Planting Fill the container with water, leaving a few inches of space at the top. Add the hydroponic nutrient solution according to the manufacturer's instructions. Use the pH testing kit to ensure the pH of the solution is within the optimal range for your chosen plants (typically between 5.5 and 6.5). Gently plant your seedlings or cuttings into the grow media in the net pots.
    Step 6: Monitoring and Maintenance Regularly monitor the water level in the container and replenish it as needed with fresh water and nutrient solution. Check the pH level regularly and adjust it as necessary. Ensure the air pump is functioning correctly and providing adequate aeration. Inspect your plants for any signs of pests or diseases.
    Conclusion: Enjoying Your Hydroponic Garden Congratulations! You have successfully built a simple DIY hydroponic system. With proper care and maintenance, you can enjoy fresh, homegrown produce year-round. Experiment with different plants and nutrient solutions to optimize your system for maximum yield. Happy growing!
    ```

    Hydroponic / Aquaponic Farming

    Hydroponic / aquaponic farming mohitmangal.com

    Organic Aquaponic Farming

    Organic aquaponic farming fity.club

    Aquaponic Farming Techniques

    Aquaponic farming techniques smallbackyardlandscapeideas.blogspot.com
    Read More..